Tag Archives: CAT6

Network Labels

How to Properly Wire CAT6 (Part 3 of 3) [Terminating and Testing Your Runs]

So by now you should have read how to run the cable as well as plan your project.  The last things you will need to do are terminate your connections and test them!

First we should quickly go over the two RJ45 wiring standards.  There is A (T-568A) and B (T-568B) standards.  There really isn’t a benefit to one over the other, as long as they match on both ends (thats how you get a straight through connection) you’re going to have success.  However, the standards A and B are color coded on pretty much any jack and patch panels you purchase for your project.

In my example I went with the B standard because I researched it is more common in corporate networking.  I believe A is older, but more popular in conjunction with running phone lines.

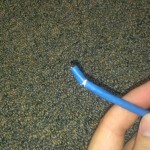
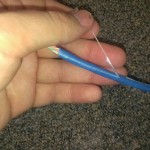
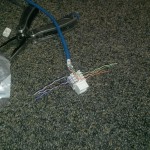
So first you are going to want to strip a short length of your cable.  If you strip further back in order to immediately unsheathe the full amount you risk the chance of damaging the pairs you are about to punch down.  They are extremely small gauge and easy to damage.  You might not even see it, but you will find out you did it when the cable doesn’t pass its tests.  So only expose a short amount of the pairs.  You will be presented with 4 pairs of wires, a cable protector, and a pull string.  This may be only present in higher quality CAT6.  So pull the pull string, and it will unsheathe more of the protective coating and reveal more of the pairs.  This will avoid the possibility of damaging the pairs during the stripping process.  Once you wires are exposed, you will want to cut away the pull string and wire divider.

Next, you want to start unraveling your wire in order to place it in the proper location to be terminated.  Make sure you only unravel as little as possible.  The twists in the pairs improve the signal quality.  The jacks you are placing the wires into should be color coded to the patter you decided to go with.

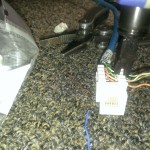
Lastly you will want to punch down the cables.  Your punch down tool has a sharp end an an end that doesn’t cut the wire.  You want to punch down each wire in a way that the outside of the wire is discarded when its fully punched.

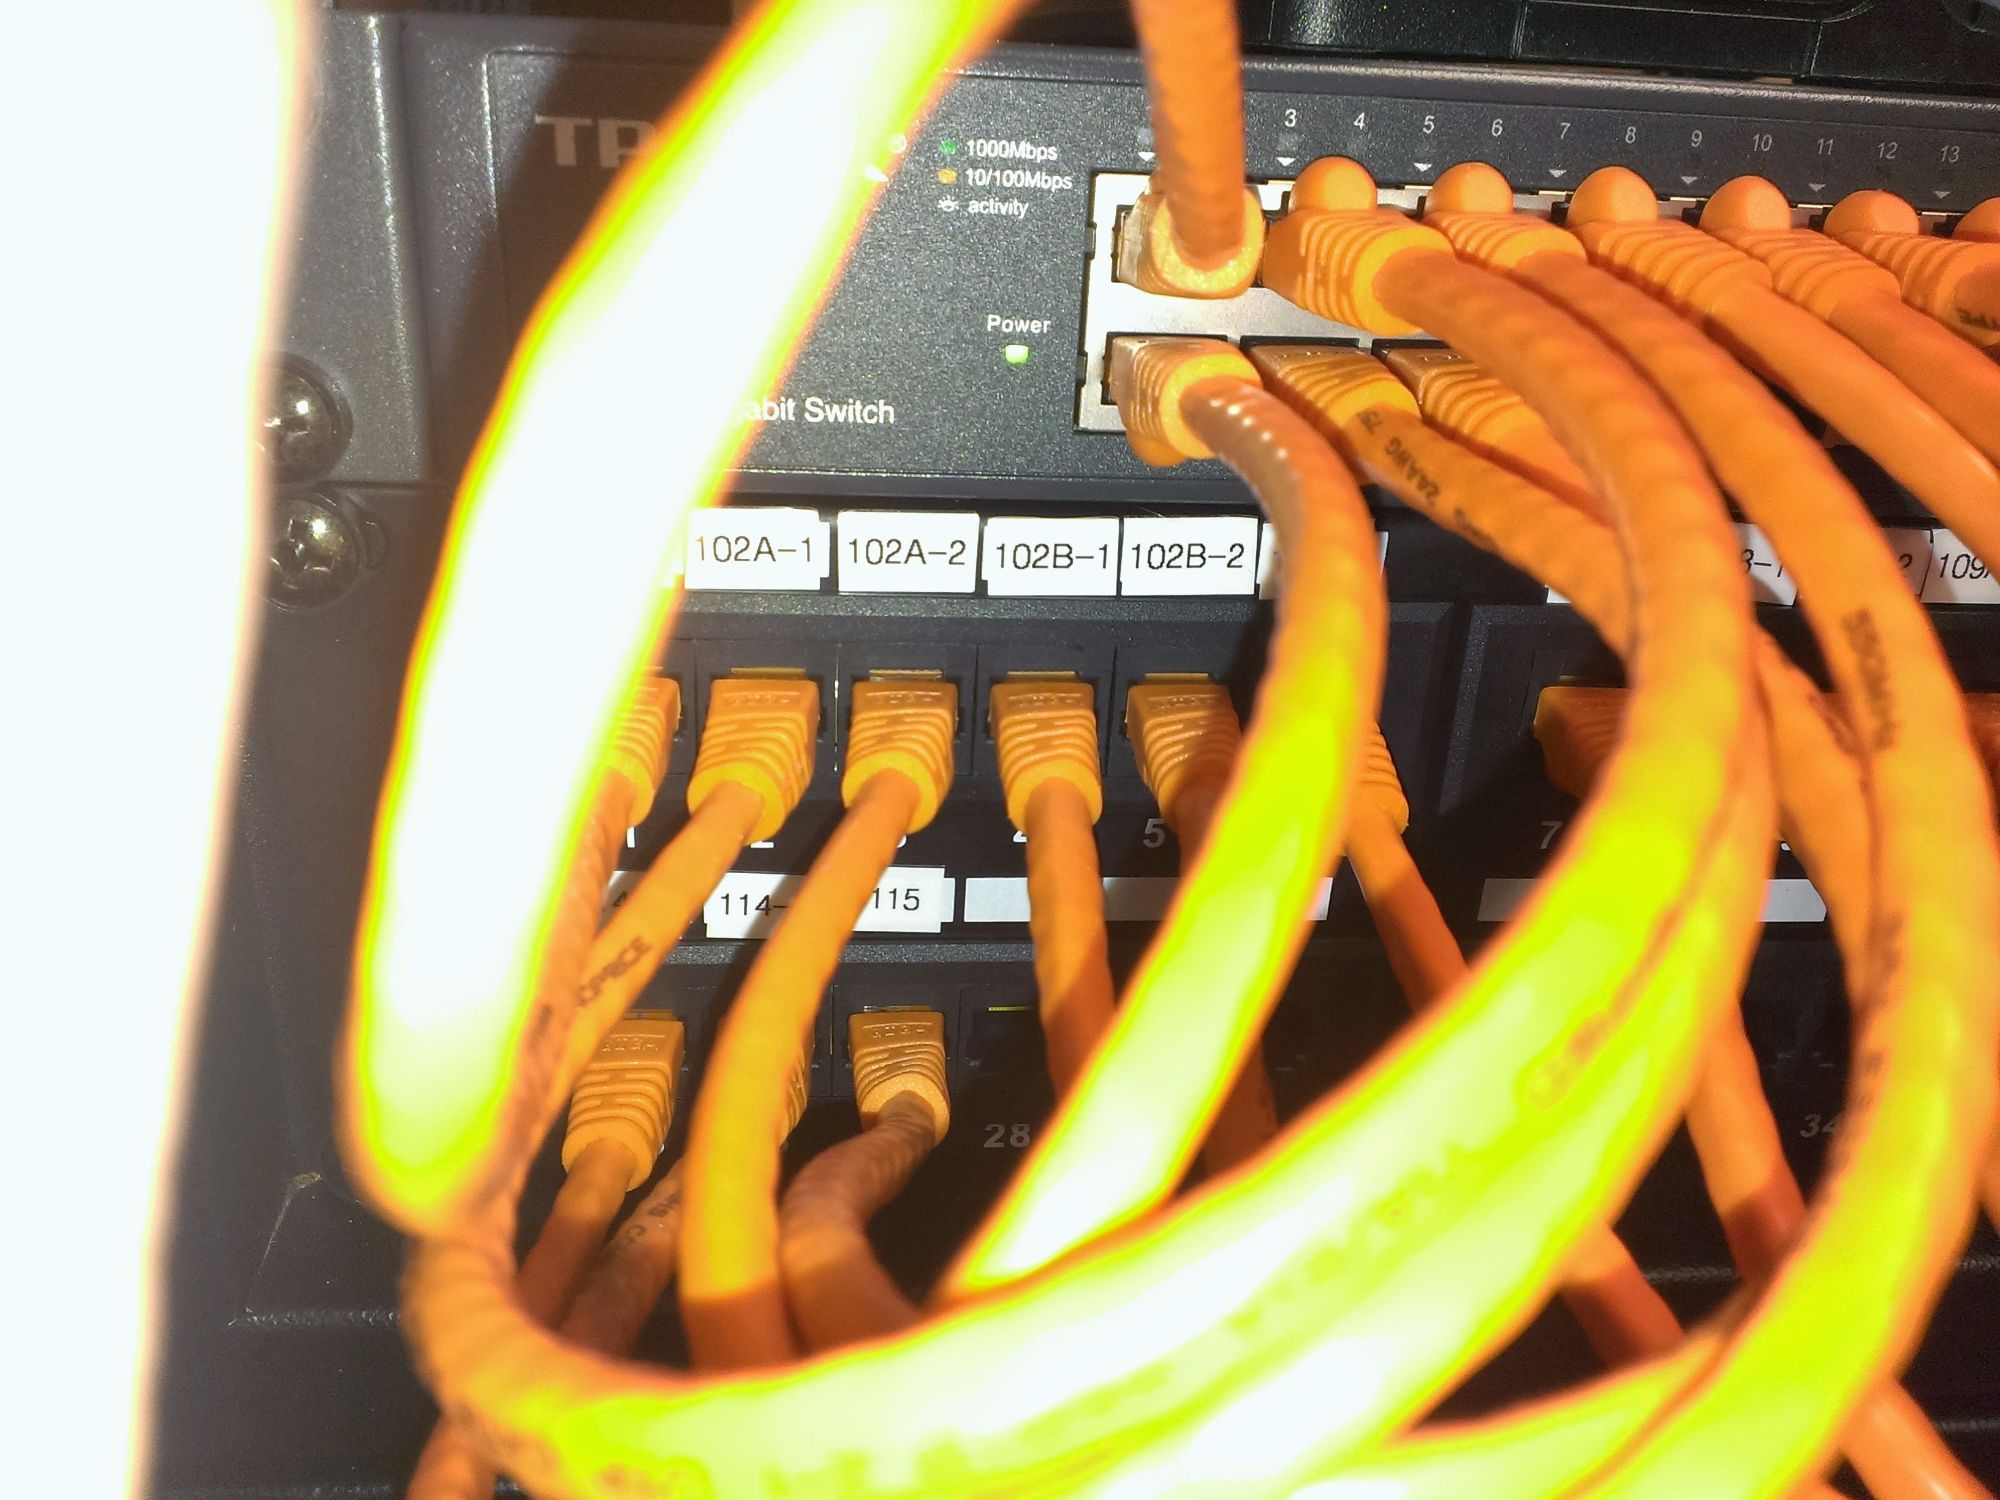
Once you have punched down all the pairs, keep the jack exposed before tucking everything away.  I recommend testing your connections before cleaning up everything up.  Punching down into the back of the patch panel is extremely similar to the wall jacks.  Stick with either A or B standards on both sides or you will create a crossover cable, and most likely have some strange networking issues because of that.

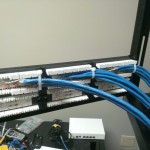
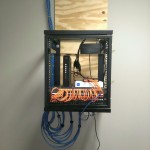
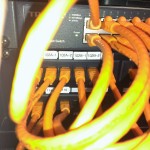
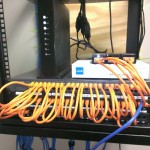
I recommend securing your patch panel to a network rack that is not able to move around.  The last thing you want is one of the pairs coming lose.  If your rack is on wheels, you’re likely going to be seeing networking issues over time.

You will also want to mount your switch right above or below your patch panel.  This will give you the ability to utilize short length patch cables and quickly get your network up and running.

Lastly you want to test each connection.  This is straight forward.  Test each pair then label them on both sides to help you stay on top of what ports have already been tested.

Once everything is labeled and tested you can tidy up your wall plates and clean up!

Don’t forget to put any drop ceiling tiles in their place.  You want to leave a good impression and I have always been told to leave places cleaner than they were.

How to Properly Wire CAT6 (Part 2 of 3) [Estimating Your Job and Running the Cable]

Alright, you already read what tools and supplies you will need, now lets move on to the next steps.  Are you doing this for yourself or for a company?  Are you getting paid?  You need to give that company an accurate estimate.  In order for you to do this, it would be best if you had a PDF floor plan of their office.  If you don’t have a some kind of floor plan, you might as well make a quick one.  You are going to want an accurate estimate.  I would recommend billing them for the time it takes to properly quote them (especially if you have to manually measure the office).  If this is a leased space, the building manager may have a floor plan.  If for some reason there isn’t a floor plan to scale, pick up a long tape measure.  I would recommend at least the 300 feet tape measure because 28 feet more and you’re exceeding CAT6’s length limitations.  With some graph paper or some office layout software scratch out a rough draft of their office (to scale).  You will want to walk around and take note of where they want new runs, where CAT5 is being replaced with CAT6 and where lines are being removed.  Keep in mind obvious limitations and avoid being parallel to power when possible.  You will also want to take a look at how the building is constructed.  Are the studs metal or wood?  Metal beams often have access holes or tabs that can be lifted to run wire.  With wood you will have to drill access holes.  All of this will cut into your time.  If you are replacing old wire you’re probably in luck.  Sometimes the holes may not always be wide enough.  Just estimate to the best of your abilities.  You don’t want to tear the place apart getting accurate measurements, you just want to spend a little time to save yourself in the end.  Something else that is also extremely important, measure the height of the ceilings.  This will add to your cable lengths and will certainly add to your estimate.

Once you have a properly created a PDF floor map with termination locations marked use a program called Foxit Reader to quickly measure distances.  Make sure to set the scale to equal your drawing.

officemeasure

At this time I create an Excel or Google document that looks like this:


Room Distance Drops Total Distance Ceiling Hieght
Entrance 101 20.36 1 38.36 9
102 A 24.7 1 42.7
102 B 18.47 4 145.88
Office 105 18.74 4 146.96
Office 108 21.92 4 159.68
Office 109 A 9.71 4 110.84
Office 109 B 16.05 4 136.2
Office 110 28.25 4 185
Office 111 A 22.54 4 162.16
Office 111 B 29.32 4 189.28
Office 112 39.17 4 228.68
Backroom 114 50.88 2 137.76
Garage 115 51.44 2 138.88
Wireless 1 18.47 1 36.47
Wireless 2 16.08 1 34.08
Wireless 3 34.92 1 52.92
45 1945.85


From here I have each location (room) defined as well as the distance.  The distance automatically adds in the ceiling height.  From here you input all of your drops and locations and you have your total length.  Now you know how much CAT6 you will need for this job.  You can also copy your work onto another worksheet and alter the amount of drops per office.  This is a quick way to provide a very detailed and accurate estimate.  The next part is something you need to figure out for yourself.  How are you going to charge the customer?  Do you charge per drop or per foot?  Depending on your location companies are charging as much as $400 per drop.  This is completely up to you.  Just as long as you cover your costs.  I would not do it for less than $1.50 a foot.  That is an extremely cheap price (this is only if its an easy job, you like the customer, or you’re hurt for cash).  You will make money, but you will wish you asked for more.  Running cable is hard work, make sure you are compensated appropriately.  You also need to charge for your equipment installations.  I would suggest that you make another excel sheet to spell out all your additional expenses  (patch panel, network rack, cover plates, patch cables, switches, battery backup) and make sure you are estimating proper hours for all the punch downs, testing, labeling, and of course running of cable.

So lets run some cable!

I’m sure there are several ways you can run cable.  I am going to go through the only two I can think of using.  The first way, the cable already exists.  Lets just say you are replacing CAT5 with CAT6 (or maybe a faulty wire).  First you will want to use your tester and make sure that where you are pulling matches start and finish.  Use your toner and trace the cables.  If you are unsure, test the pairs of the cables in question.  Once you have proven that you have the right wire on both ends, secure new wire to one of the ends.  If you are replacing a single run with two runs, hopefully you have two spools of wire (if you only have one spool but need two runs use a pole rope).  Using duct tape wrap two new runs to this old CAT5 you have already pulled from its punch down panel or port.  Wrap this as tightly and securely as you possibly can.  You will also want to take this time to mark one of the wire to distinguish the two new cables.  Hopefully you have a partner helping you.  This will really speed up the wiring process.  One person will be feeding wire and the other will be gently pulling.  There are so many things that it can get stuck on even in a drop ceiling construction building, so take your time.  If you manage to pull the old wire out and away from the new runs, you will be creating more work for yourself.  Fishing new line through a whole in the wall can be a real challenge.  I can’t stress enough to secure your new line tightly to the old line.  If something gets snagged get up on a ladder and find out what is holding you back.  Don’t keep pulling.  The wire will give (or worse, something else gives).  This is where having two ladders and 2-way radios is very helpful.  When you finally make it through pull the new line at least three feet out of its opening.  It’s always good to have a little extra on both ends so you never cut yourself short.  You also don’t want this run to be necessarily tight.  There is no need to put stress on the cable.

The other way you would run a wire is if its a brand new building with new wire to be run.  You would want to use a cable snake.  The snake is handy because it wont tangle up easily.  It makes it possible to guide the flimsy wire through small and tight places.  If you are running wire in a drop ceiling with enough room, you can probably toss a coil of cable in the general direction of the future termination, then finish the job with the snake.

Often times a building will have whats called a firewall in the construction of the walls.  If that’s the case you will need a special extra long drill bit.  A firewall is essentially a horizontal 2 by 4 that stops a fire from spreading as quickly.  These are great to have, but extremely difficult when running wire.  What you will want to do in this case is look for a location to run all or the majority of your runs up into the attic, then move down (or in the basement and up, whatever makes sense).  That way you are not constantly drilling.  I would much rather use more cable than be drilling holes all day for the project.  Especially if there are firewall beams hidden in the walls.  Just think about that before planning our your cable runs.  Time is money, and your time is much more valuable than a few hundred extra length of CAT6

I can not stress enough how important it is to turn power off in the areas you are running wire.  With that being said, I would recommend the use of flashlights.  Headlamps are the absolute best thing.  You can not have enough flashlights!

That concludes today’s lesson, next I will tell you about punching down your runs, and testing those cables.


How to Properly Wire CAT6 (Part 1 of 3) [Tools and Supplies]

Tonight I am going to go over something every tech person should do at least once.  I feel every system administrator or tech geek should be able to wire their home or office with at least a few network runs.  In order to do it properly you will want the following tools:

You will also need the following supplies:

I am going to go over the list above in greater detail.  I feel like the cable snake is a pretty important tool for running new wire.  You can sometimes get by without a snake if you are replacing CAT5 with CAT6 (or some other wire).  With this method you may be able to use duct tape to secure to the old wire and pull your new runs.  The cable snake is going to be essential for wiring a building with no runs in place.  Another great tool to have is pull rope, or twine.  A pull rope is preferred because it is designed for the job, but twine will usually work if you have it already.  This is extremely nice if you are pulling multiple lines and only have one spool.  Or maybe you are just pulling more lines than you have spools of CAT6.  In this method you would pull your CAT6 and secure the pull rope for future runs.  This is especially recommended if you have any drywall to repair after running cables.

A Dremel is just a great tool to have.  It can get you out of trouble when things just don’t fit right.  It will cut through metal, wood, drywall, you name it.  A Jab Saw should get you buy in most cases, but I highly recommend a Dremel.

Next is a Cordless Drill.  Corded will work, but its a pain when you need to drill in the attic or high in the ceiling.  A charged battery should last you the entire job, and be more than enough.  I also use my drill with a screw driver bit.  This speeds up the process of removing wall plates and will help with unnecessary fatigue.

If you are punching down to any wall plates you will want a punch down tool.  Don’t go cheap on this tool, it is very important you are not screwing these connections up.  You will pay for it in the end.

An RJ45 Crimping Tool will be needed if you are terminating to an RJ45 Connector.  This would really only be if you are making patch cables or sometimes PoE AP’s would want this end terminated.

Wire Cutters are very important.  The cutters built into any crimping tool or multi-tool (however, very nice to have) will just slow you down.  Get the real thing and keep them with you.

Screw drivers are an obvious need here.  You probably already have some, but make sure you do, because this is not optional.  Many times wall plates are flat head (I really don’t know why they went that route).  Another good idea here would be screw bits for your cordless drill.  If you have bits for your drill, have at least a regular flat head and Philips screwdrivers on hand.  I have gone to quickly in the past and ruined an outlet by slipping with the drill.  This wont happen with hand tools.

A flashlight is important.  Many times when you are running wire it may be near some power.  Don’t chance jabbing your metal cable snake into that life-ender, (They do make fiberglass tools to run wire, but you’re still running a copper line, just be safe!) just turn the power off, and use flashlights.  I recommend a headlamp of course.  Sure, it looks like you are spelunking, but you’ll get the job done faster and with much less frustration.  Thinking back to before I was using a headlamp was dark times (lol, a pun!).

A network tester is important.  You can certainly go cheaper than what I have linked.  However, if you plan on doing this professionally, I would recommend getting a nice cable tester.  They will tell you everything you need to know.  If you want to go the cheap route, you can get a toner and a cable pin out reader.

A label maker is really nice to make the job look professional.  I can’t tell you how many placed I have been to where they just write on the wall plate with a pen.  It looks trashy and you can’t always read their handwriting.  Not to mention it makes you wonder how well they ran or crimped the cables.

Two-Way Radios are a big help because this is usually a two person job.  You don’t want to be yelling down the halls during business hours, and they make it more fun as well!

You will need a ladder.  You shouldn’t be standing on chairs and desks, you need a ladder.  A folding ladder like the one linked is incredibly handy.  Mine fits in my little compact car (with the seats down) and it can fold into a ladder twice the size.  The only downfall is that it is a tad heavy.


Some other tools that may be needed are a socket set, a set of pliers and a nice knife.  You never know what you are getting into.  For example I had to assemble a small server cabinet that had rolling casters.  Many network and server cabinets (even two post) will require a socket set.  If you are installing a two-post rack, you will want to secure it to the floor.  This usually means drilling into cement.  Get yourself a nice masonry bit set for the job.

Once you have collected all or most of the tools above, you will be ready for the next part of this post.  If you are on a budget and just want to get the minimal tools you can just pick up a simple networking kit.