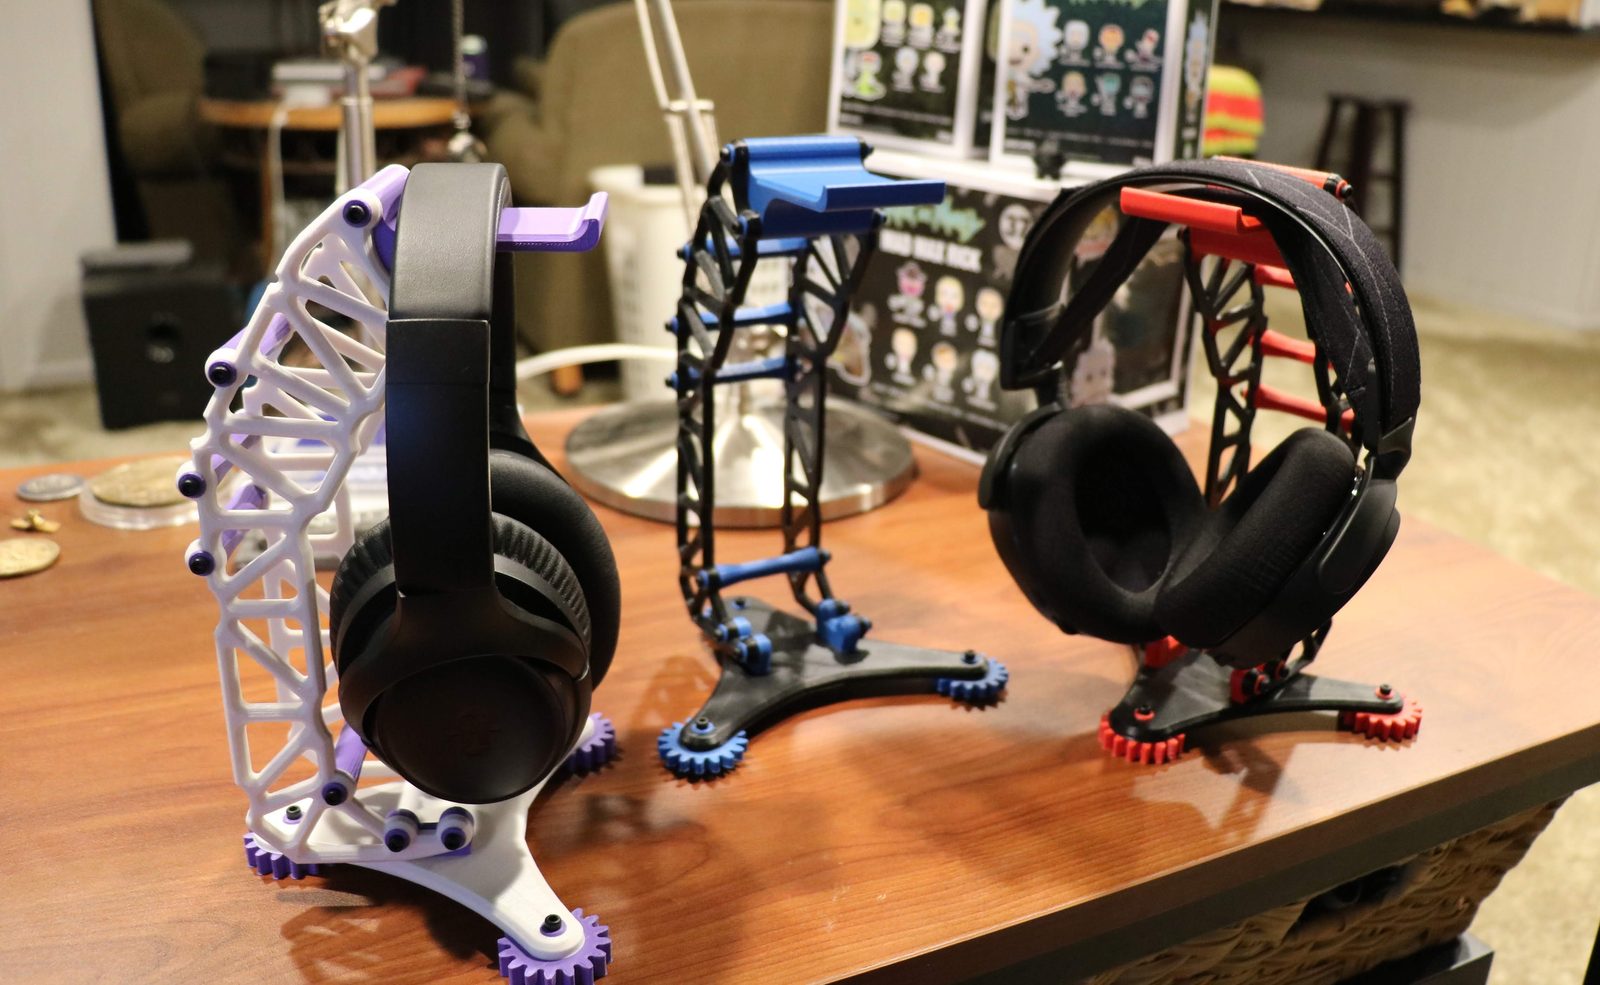
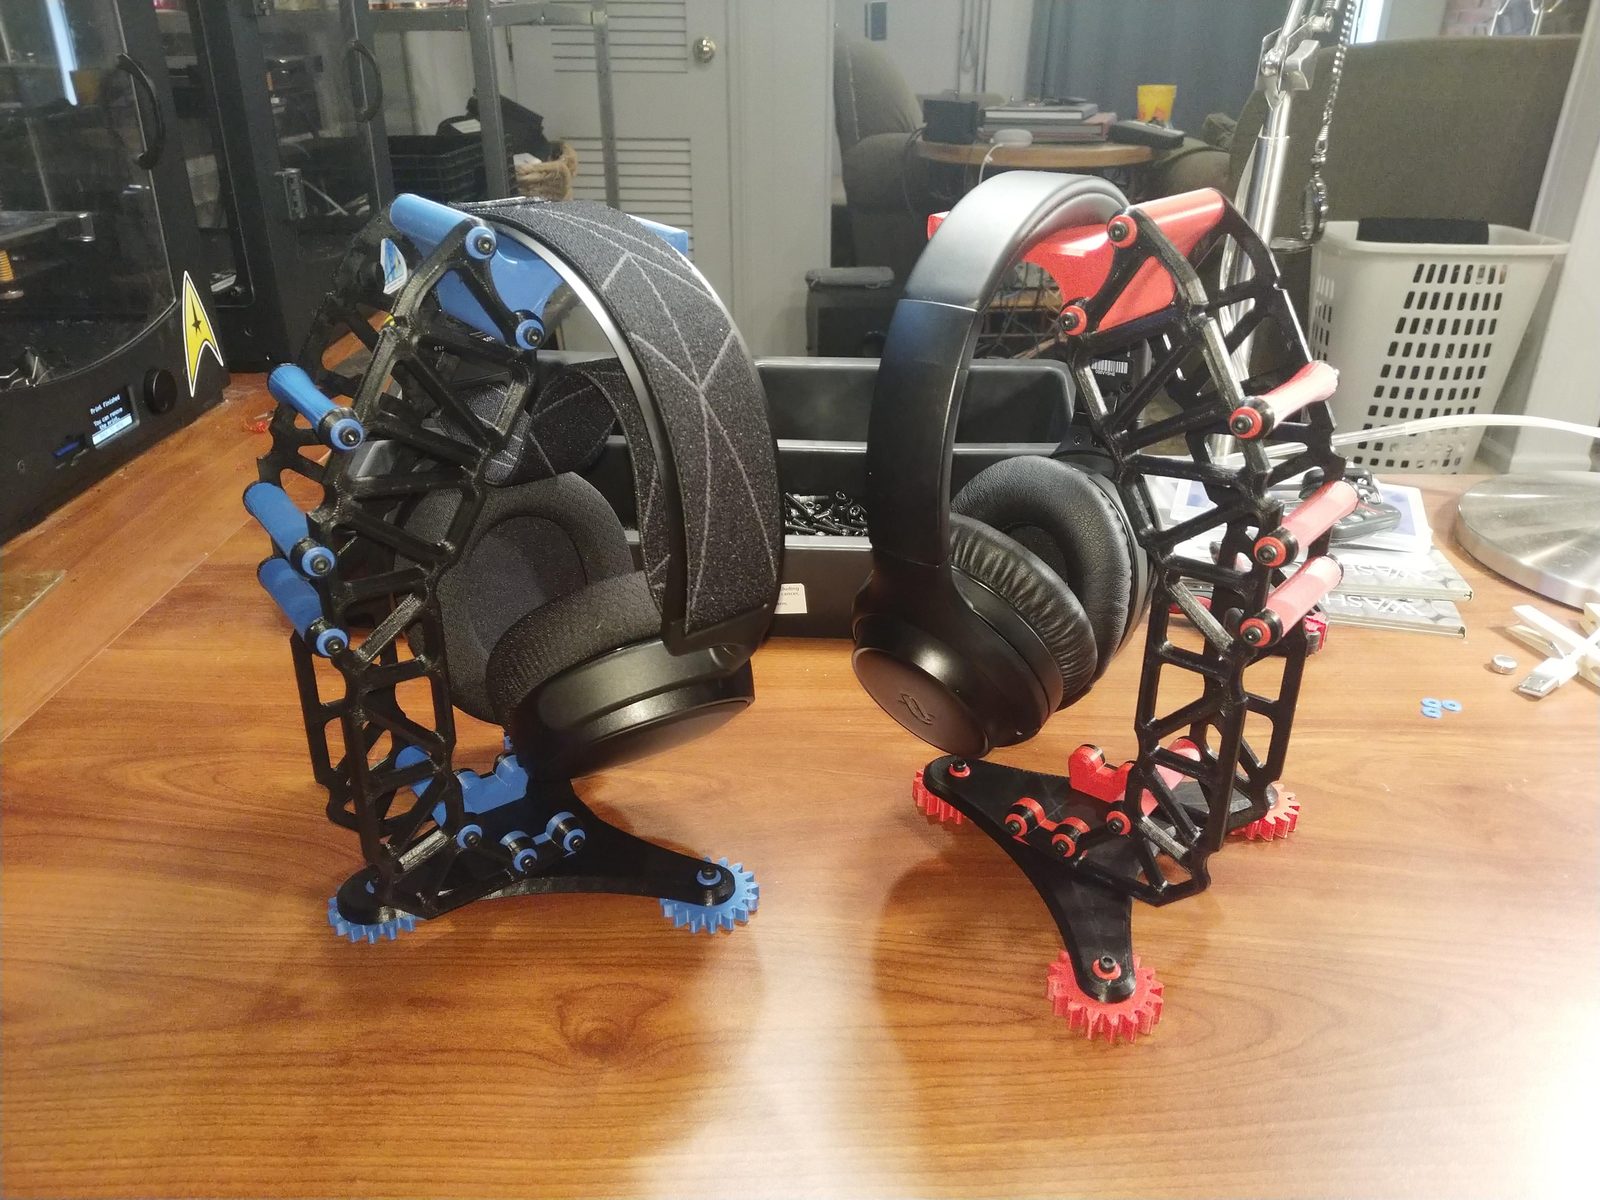
Thanks for ordering my 3D printed headphone stand. Make sure you have all the following parts before you begin.
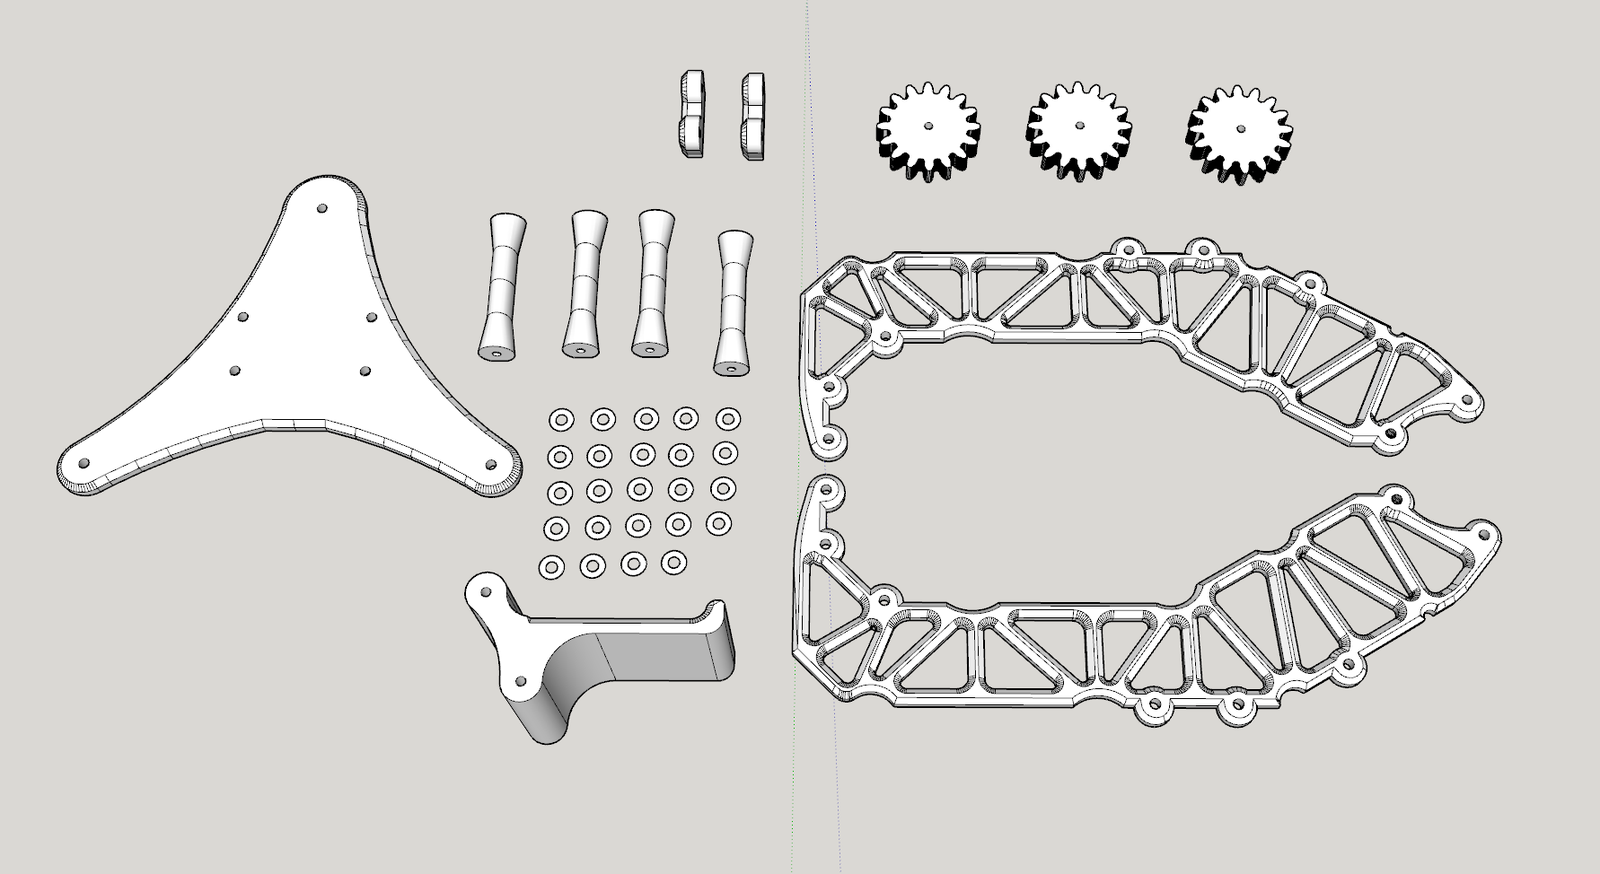
Parts list
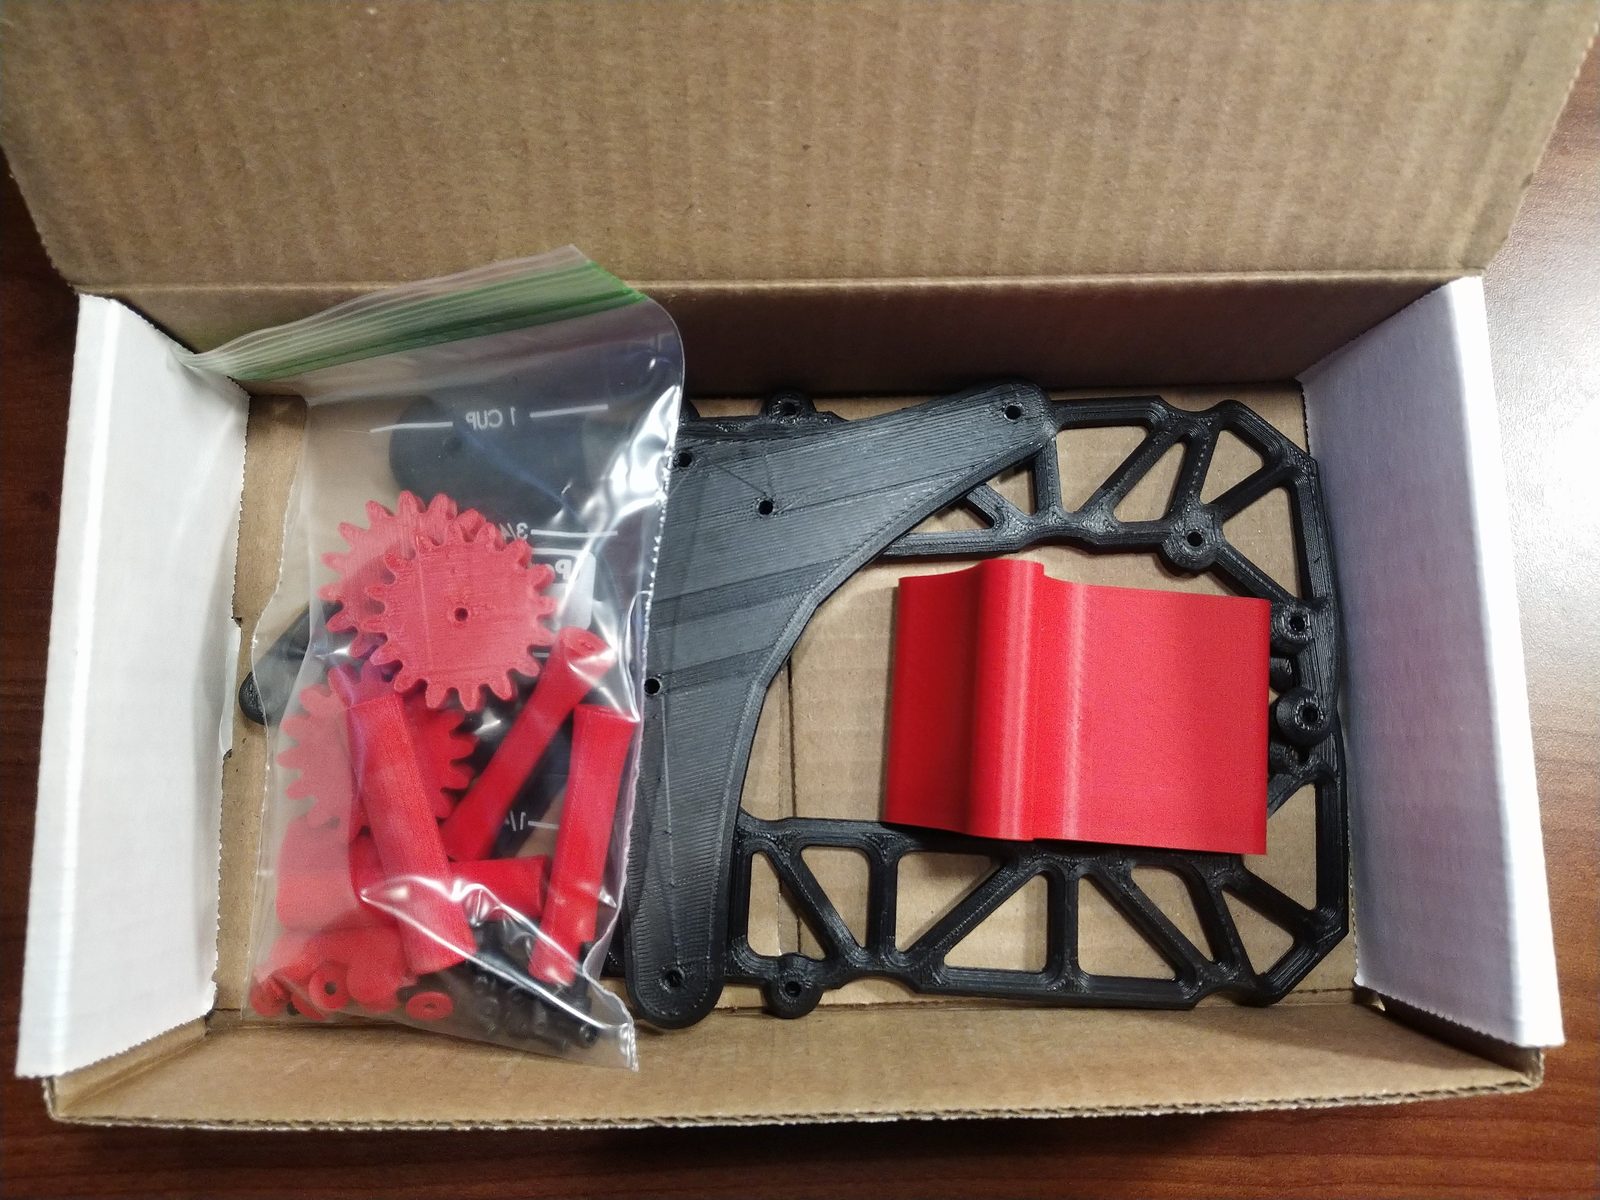
- 1 × Left Tower
- 1 × Right Tower
- 1 × Base
- 1 × Headphone Hook
- 3 × Gears
- 4 × Spacers
- 2 × Base Connectors
- 24 × Washers
- 24 × 3M Screws
- 1 × Hex Key
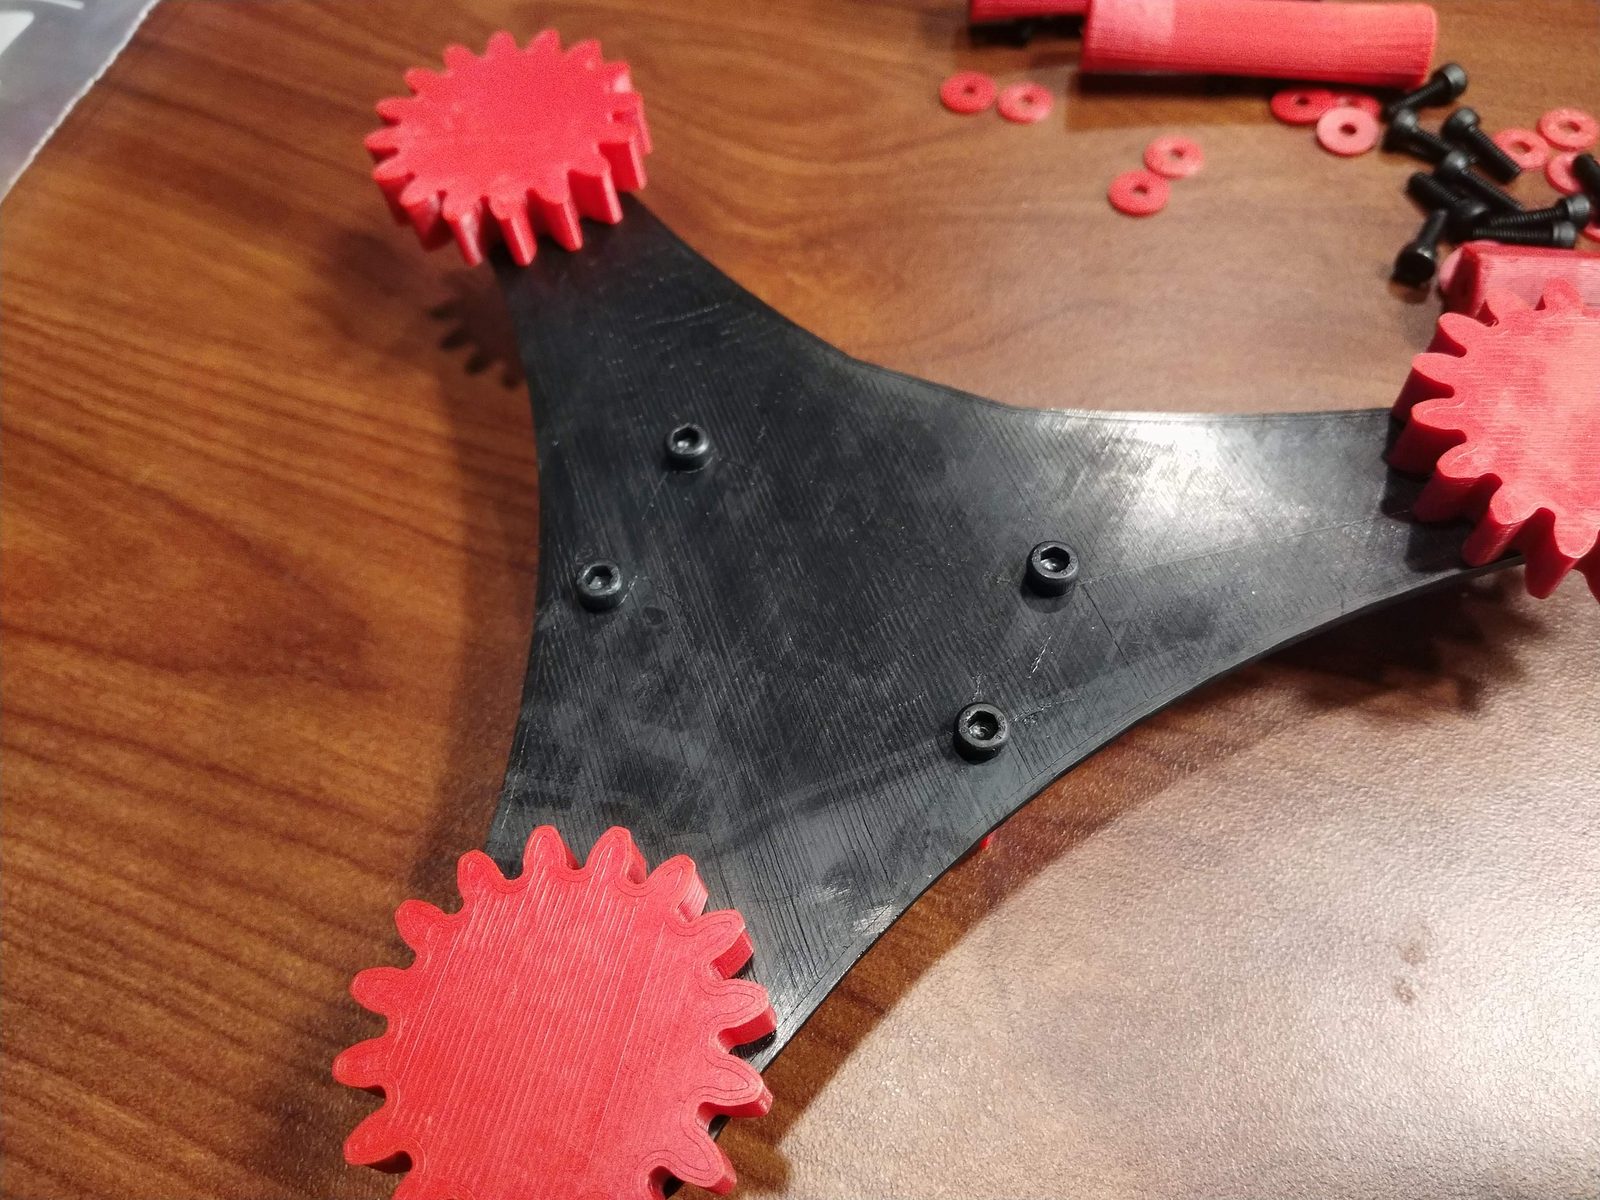
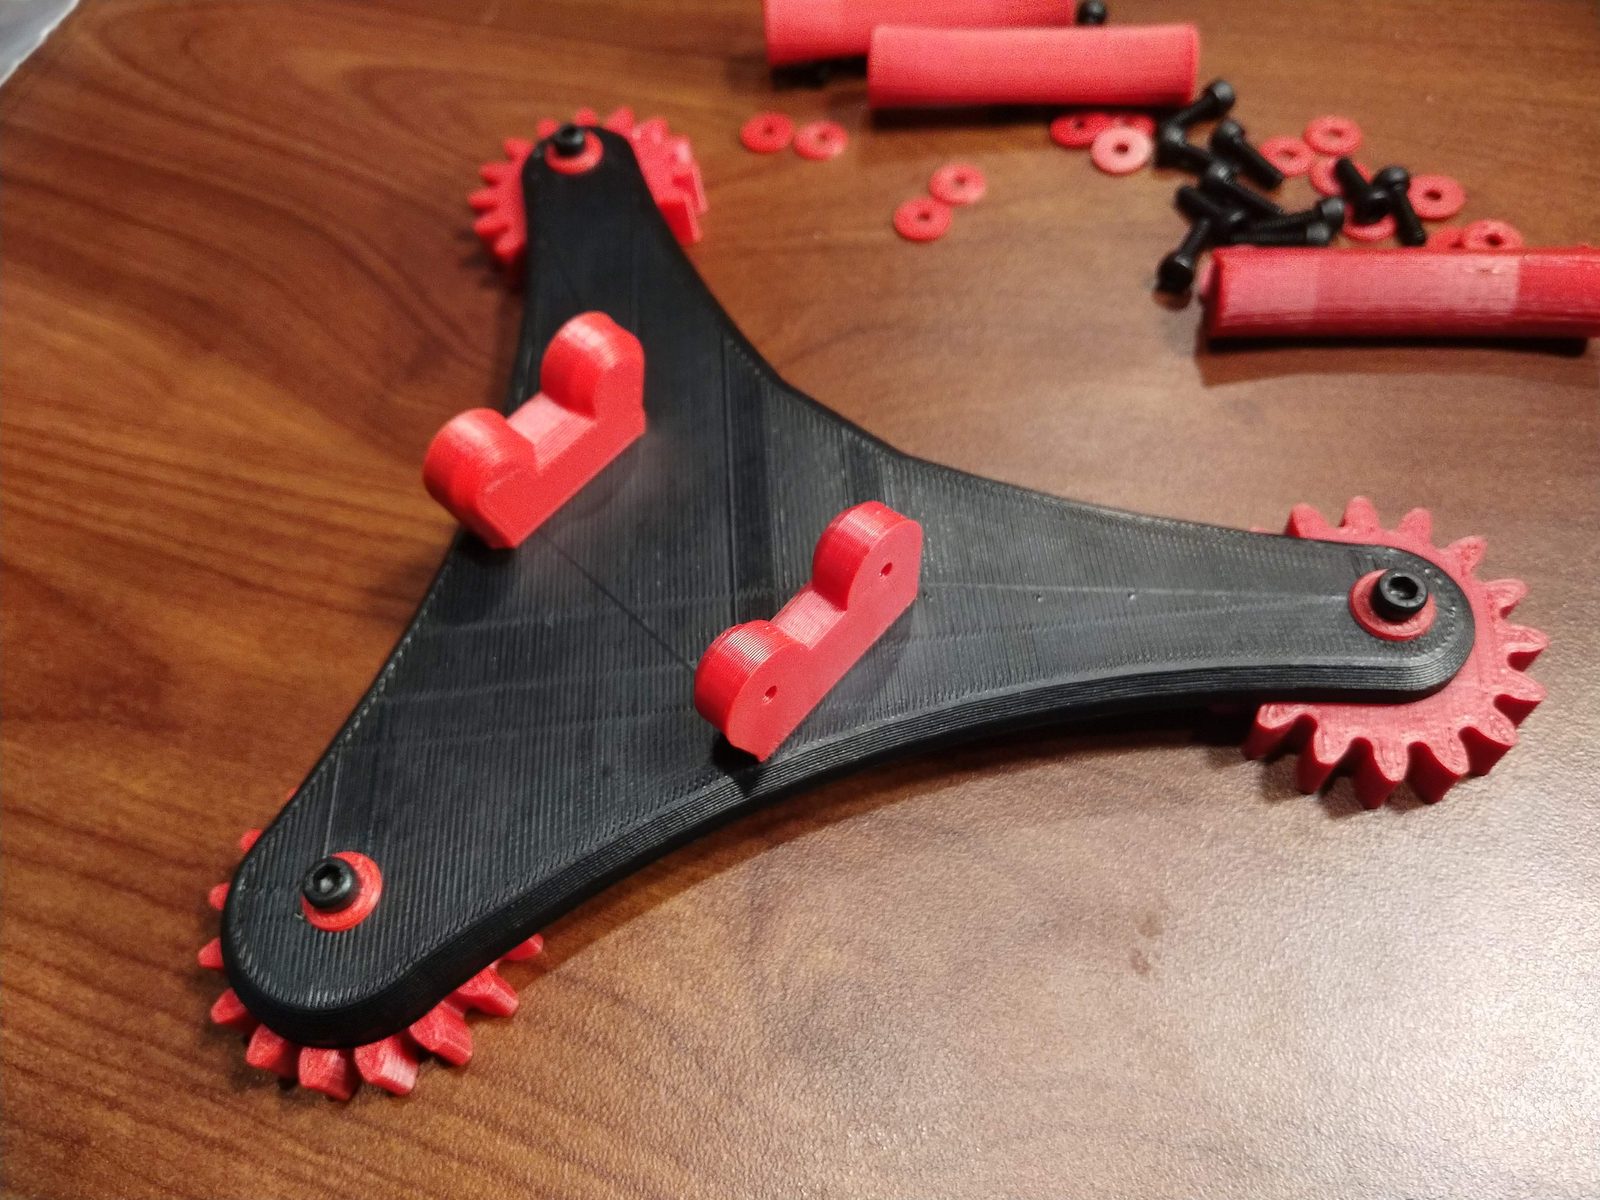
Step 1 — Assemble the base
Attach the 2 base connectors to the base itself. The smoother portion of the base is the bottom. 4 bolts push through the center of the base and connect to the adapters. Washers are optional on the underside of the base.
Step 2 — Assemble the towers
Pick either the left or right tower and start to assemble it. Make sure to use washers to give it that contrasted look between the two colors. The gears are purely decorative — position them so they look good.
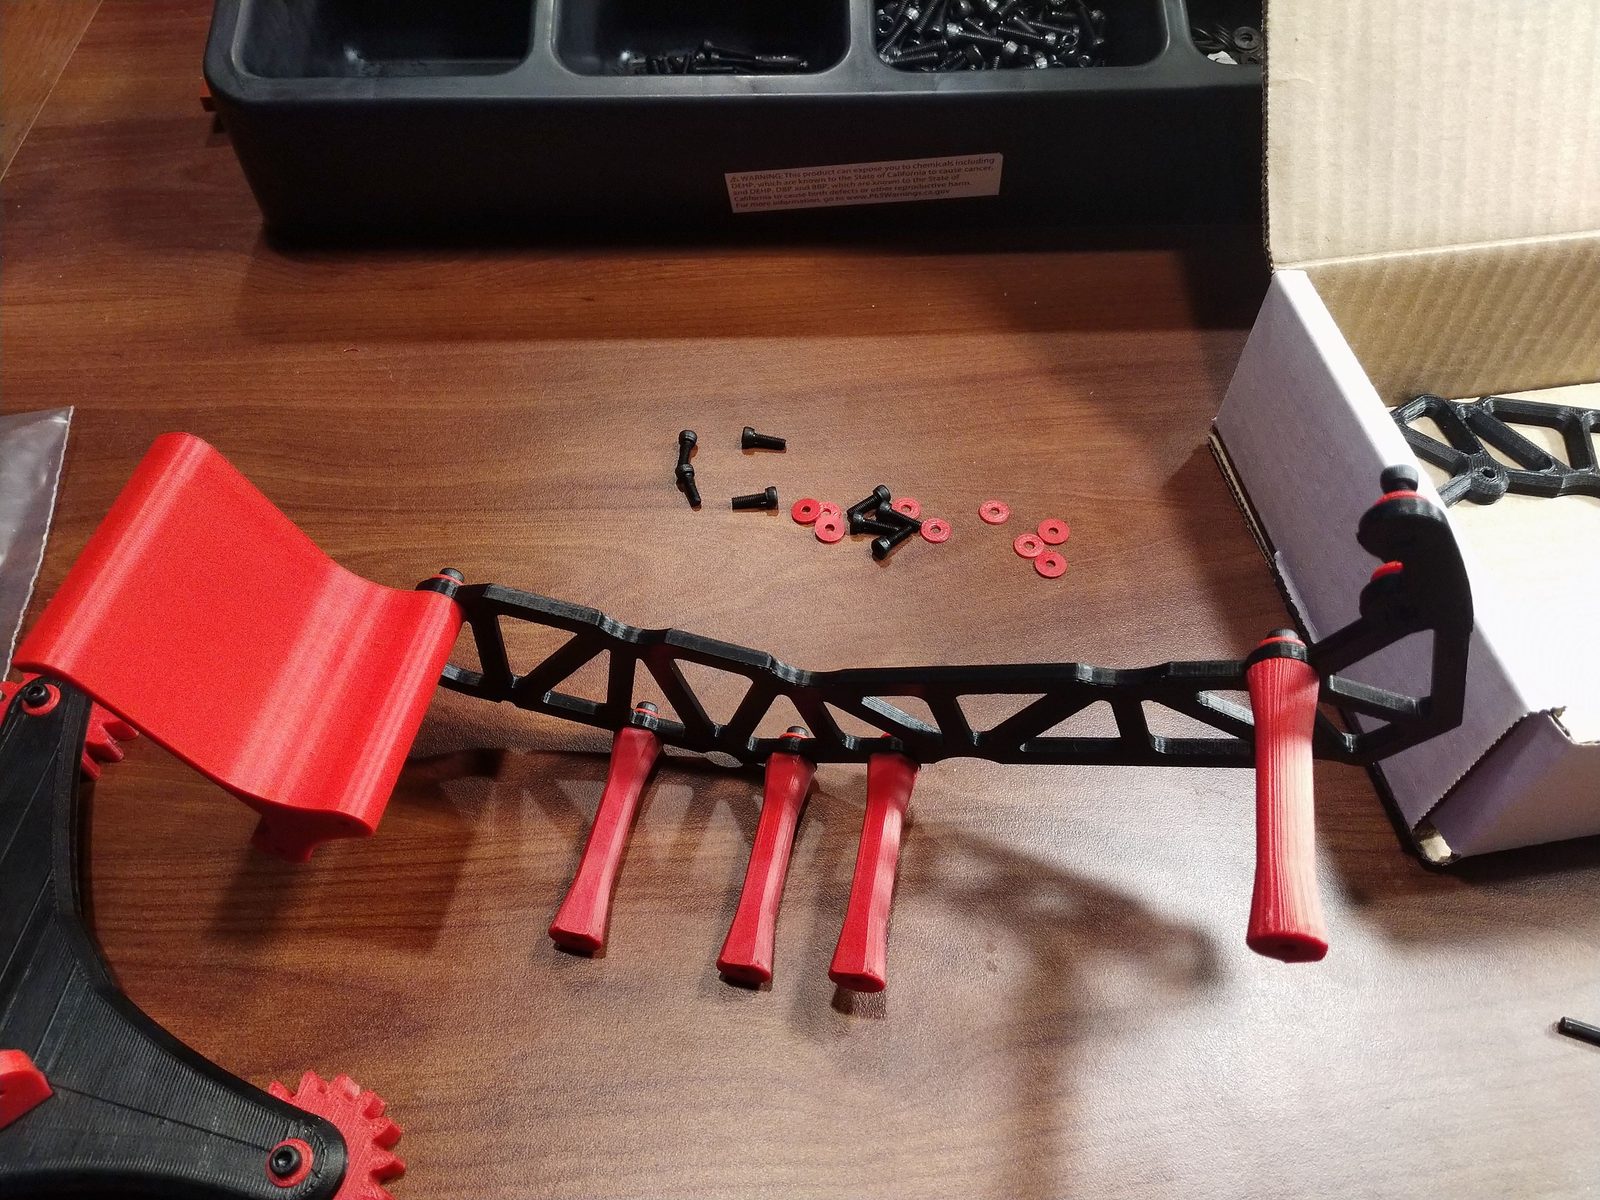
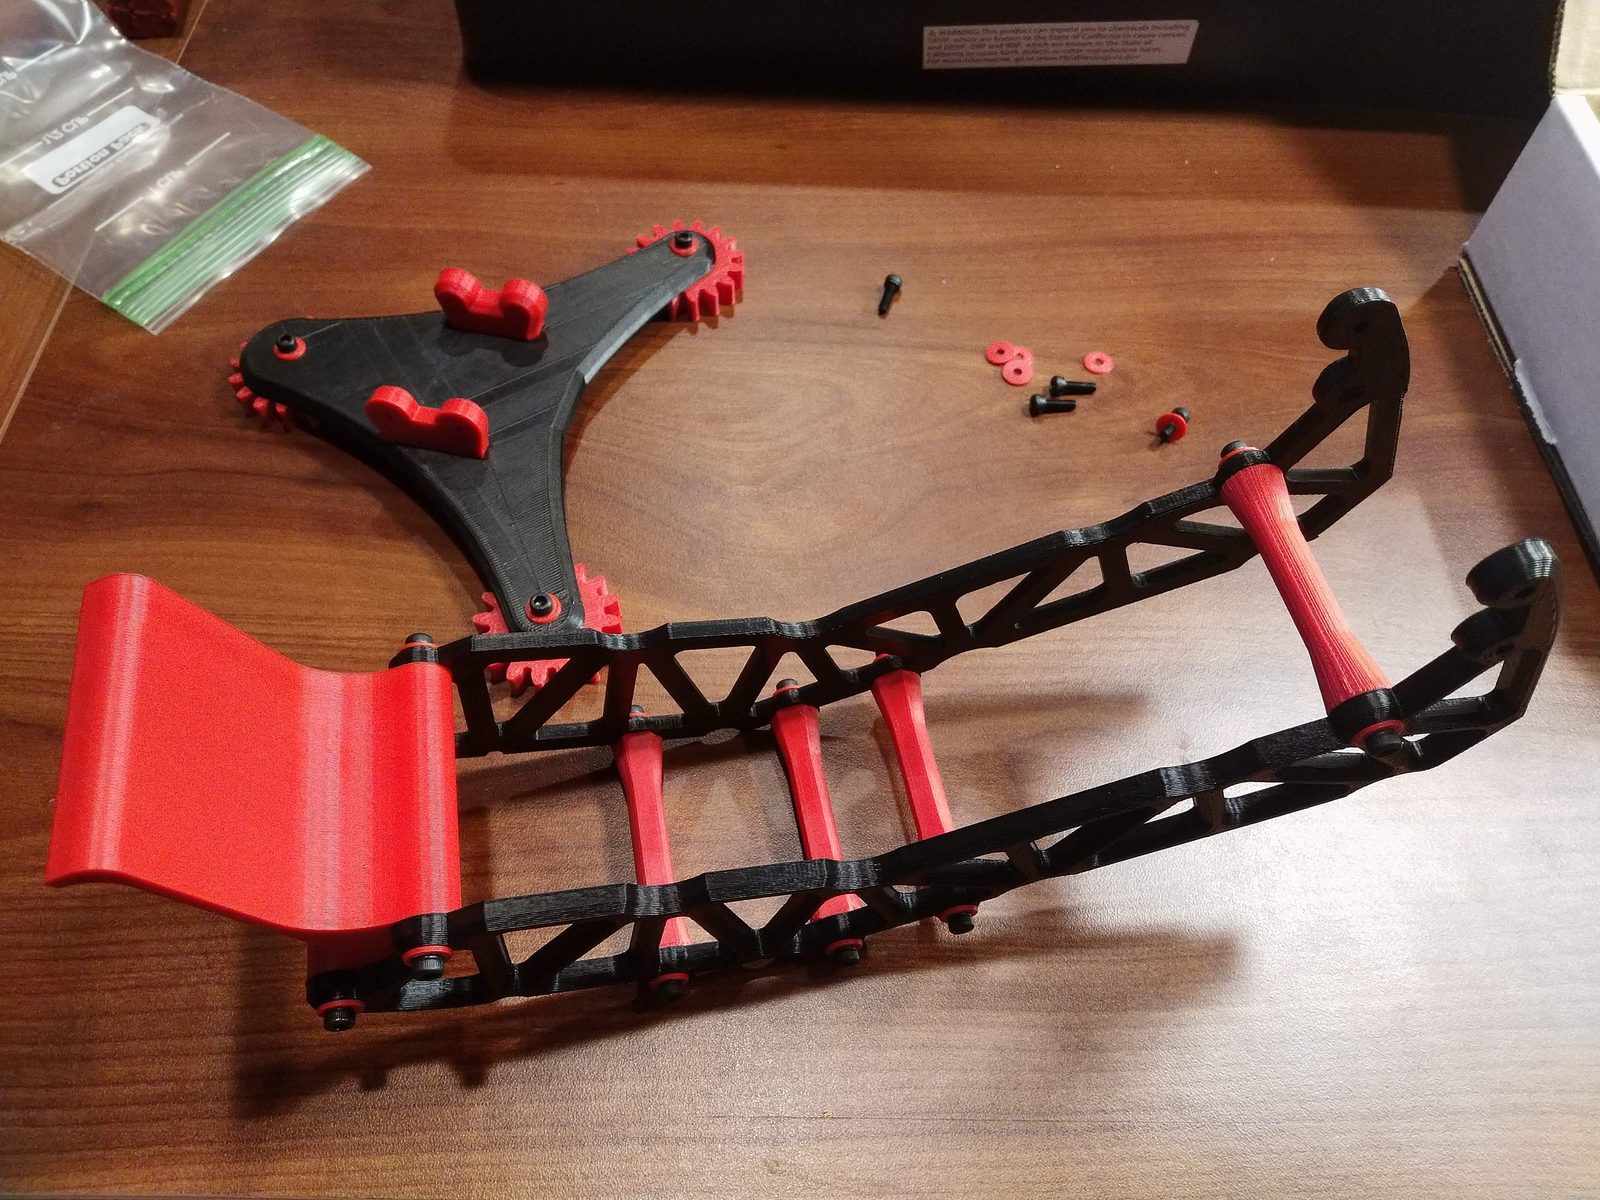

Step 3 — Attach towers to base
Once both towers are assembled, secure them to the base connectors using the remaining 3M screws. Make sure the hook side is oriented at the top.
Step 4 — Attach the headphone hook
Slide the headphone hook into the top of one of the towers. It should fit snugly. Orient it however looks best.
Tip: Don't overtighten the 3M screws — they're threading into 3D printed plastic. Snug is good, cranked down will strip the holes.
Having trouble?
If something doesn't fit or a piece arrived damaged, get in touch or message me through Etsy and I'll sort it out.